Materials
About
For an object to have images applied in any way, it must first have one or more materials assigned to it.
A material in the Neversoft engine is composed of one or more textures (images) to compose the final result.
A material in the Neversoft engine is composed of one or more textures (images) to compose the final result.
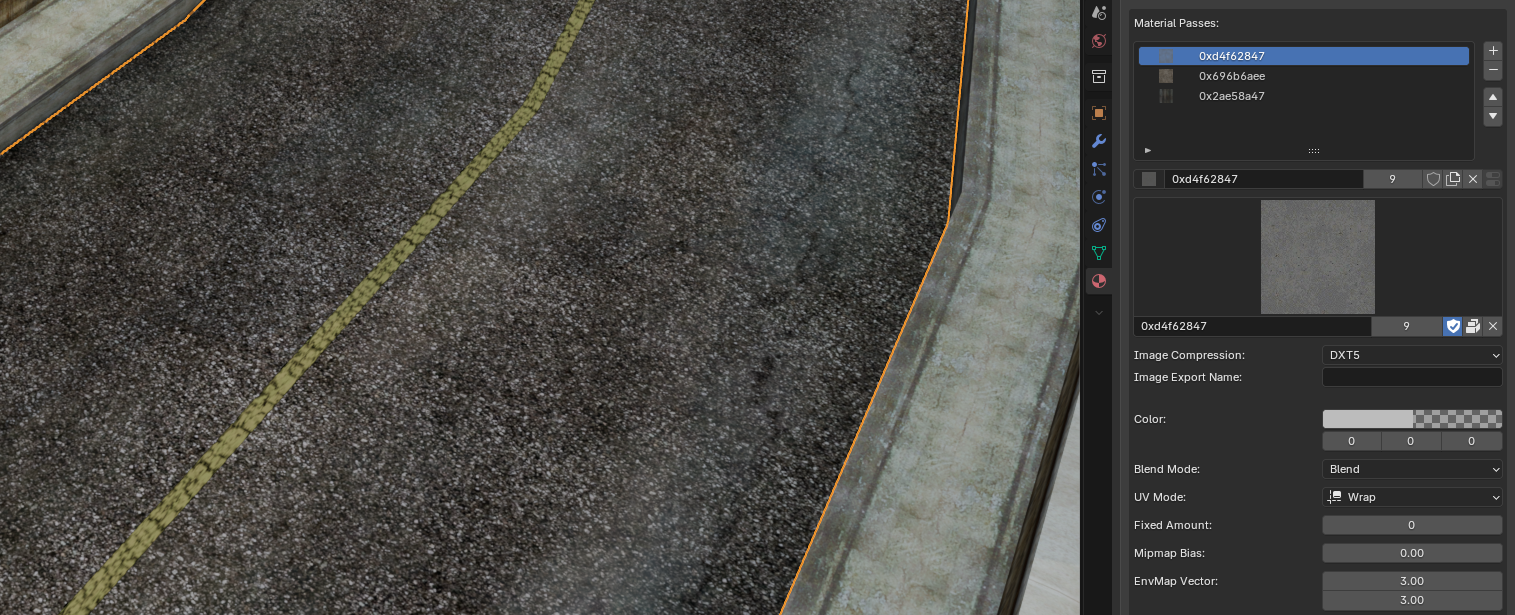
Passes
For "legacy" materials (found in THPS4 - THAW), a material can have up to four passes.
A pass, or texture slot, references a single image and stores properties that can be changed in NXTools.
The properties shown above are:
The color of the pass. This effectively controls the tint of the layer.
How the pass will be applied onto previous passes.
Think of layer modes in image editors such as Photoshop. A material's passes will be layered on top of each other, with the blend mode affecting how this occurs for each layer.
See the Blend Modes section below for more details and a visual explanation.
Affects the behavior of the UV's on the pass when exceeding the canvas bounds.
Clipping can be performed on one, or both, of the image's axes:
See the UV Clipping section below for more details and a visual explanation.
Sets the fixed alpha value for "Fixed"-type blend modes.
Each pixel on the pass will have this alpha value, regardless of the original alpha on the texture.
Affects the bias when determining which mipmap to use for the texture.
Textures typically have lower resolution versions called mipmaps which are seen at a distance or at certain angles. The Mipmap Bias value can alter the distance at which certain resolutions are seen.
The general concept of mipmaps deserves explanation in a separate document. This is a somewhat niche and technical setting that applies to those familiar with graphics pipelines.
Affects the scaling of environment map effects.
For reflections and passes that use an environment map effect, this affects the tiling of the final image.
Has seemingly no effect.
Has seemingly no effect.
Marks the material as transparent. This only has an effect when used on the first pass.
Transparent materials are essentially "partially transparent" and rendered differently from other materials. A material's draw order comes into play heavily when using this form of transparency.
This should be used for glass, godrays, or anything that has transparency without hard edges.
Uses an environment map effect on the pass. The pass will have a "reflection" effect when the camera rotates.
Modifying the EnvMap Vector of the pass will affect the tiling of its reflection.
Applies UV wibbling to the pass. Essentially used for panning or scrolling textures.
Enabling this parameter exposes various new properties. See the UV Wibbles section below.
Applies vertex color wibbling to the pass. Unsupported in NXTools for now.
VC wibbling effectively animates the mesh's raw vertex colors over time. This type of wibbling has a variety of effects but can be used for fading lights, color-changing textures, and more.
Prevents vertex alpha from affecting the opacity of the pass.
This parameter becomes useful in situations like terrain blending, where the alpha of the first pass should remain intact while the alpha of the second pass is modified.
This effectively allows certain passes to be "painted onto" other passes using vertex alpha.
Locks the color of the pass and prevents any sort of color changes.
The effect of this parameter varies depending on whether or not the material is used on level geometry.
Marks the pass as a frame-by-frame animated texture.
This parameter allows the use of frame-based animation, cycling between multiple images over time. Time values for each frame can be specified to affect animation speed.
Enabling this parameter exposes various new properties. See the Animated Textures section below.
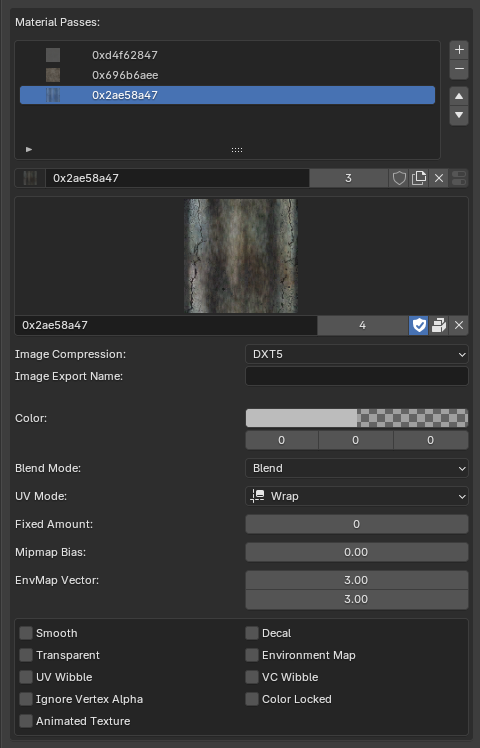
A pass, or texture slot, references a single image and stores properties that can be changed in NXTools.
The properties shown above are:
Color
The color of the pass. This effectively controls the tint of the layer.
Blend Mode
How the pass will be applied onto previous passes.
Think of layer modes in image editors such as Photoshop. A material's passes will be layered on top of each other, with the blend mode affecting how this occurs for each layer.
See the Blend Modes section below for more details and a visual explanation.
UV Mode
Affects the behavior of the UV's on the pass when exceeding the canvas bounds.
Wrap will cause the image to repeat infinitely.Clip will cause the image to stretch infinitely with the pixels found on the image's edge.Clipping can be performed on one, or both, of the image's axes:
Clip X will clip the image on the horizontal axis. (Left and right)
Clip Y will clip the image on the vertical axis. *(Up and down)*
Clip XY will clip the image on both axes.
See the UV Clipping section below for more details and a visual explanation.
Fixed Amount
Sets the fixed alpha value for "Fixed"-type blend modes.
Each pixel on the pass will have this alpha value, regardless of the original alpha on the texture.
Mipmap Bias
Affects the bias when determining which mipmap to use for the texture.
Textures typically have lower resolution versions called mipmaps which are seen at a distance or at certain angles. The Mipmap Bias value can alter the distance at which certain resolutions are seen.
Negative values will generally make distant textures appear sharper.
Positive values will generally make distant textures appear blurrier.
The general concept of mipmaps deserves explanation in a separate document. This is a somewhat niche and technical setting that applies to those familiar with graphics pipelines.
EnvMap Vector
Affects the scaling of environment map effects.
For reflections and passes that use an environment map effect, this affects the tiling of the final image.
Smooth
Has seemingly no effect.
Decal
Has seemingly no effect.
Transparent
Marks the material as transparent. This only has an effect when used on the first pass.
Transparent materials are essentially "partially transparent" and rendered differently from other materials. A material's draw order comes into play heavily when using this form of transparency.
This should be used for glass, godrays, or anything that has transparency without hard edges.
Environment Map
Uses an environment map effect on the pass. The pass will have a "reflection" effect when the camera rotates.
Modifying the EnvMap Vector of the pass will affect the tiling of its reflection.
UV Wibble
Applies UV wibbling to the pass. Essentially used for panning or scrolling textures.
Enabling this parameter exposes various new properties. See the UV Wibbles section below.
VC Wibble
Applies vertex color wibbling to the pass. Unsupported in NXTools for now.
VC wibbling effectively animates the mesh's raw vertex colors over time. This type of wibbling has a variety of effects but can be used for fading lights, color-changing textures, and more.
Ignore Vertex Alpha
Prevents vertex alpha from affecting the opacity of the pass.
This parameter becomes useful in situations like terrain blending, where the alpha of the first pass should remain intact while the alpha of the second pass is modified.
This effectively allows certain passes to be "painted onto" other passes using vertex alpha.
Color Locked
Locks the color of the pass and prevents any sort of color changes.
The effect of this parameter varies depending on whether or not the material is used on level geometry.
For level geometry, this marks the pass as full bright. Level brightness will not affect it.
For skinned meshes, this prevents Create-a-Skater coloring from tinting the pass.
Animated Texture
Marks the pass as a frame-by-frame animated texture.
This parameter allows the use of frame-based animation, cycling between multiple images over time. Time values for each frame can be specified to affect animation speed.
Enabling this parameter exposes various new properties. See the Animated Textures section below.
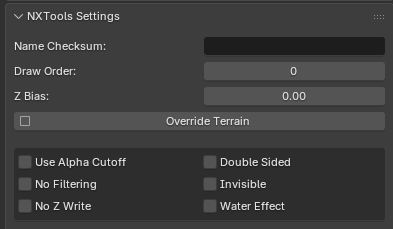
Parameters
The material itself has a multitude of parameters that can be tweaked.
A secondary internal identifier for the material. Certain name checksums, especially on Create-a-Skater items, serve unique purposes.
Affects the draw order of the material.
Materials in the scene are generally sorted by their draw order, with the lowest values being rendered first. Prior to next-gen titles, the Neversoft engine has very enigmatic transparency.
A material's draw order becomes very important in ensuring proper partial transparency for glass, fencing, and more.
Affects the Z bias of the material.
In cases like decals or graffiti, faces on a mesh may be "on top of" other faces. Often times, these cases lead to behavior called Z fighting where the renderer fights to show both faces.
An easy fix to this problem is to apply a Z bias to the decal's material. This moves the material toward the camera slightly and aids in fixing Z fighting.
An NXTools-specific property designed to aid in map creation.
With this property, any collision face with the material assigned will use its provided terrain type.

See the Collision page for more details about faces and terrain types.
Allows the material's alpha cutoff to be changed.
Any pixels with an alpha value lower than the material's defined alpha cutoff will not be rendered. This behavior is known as "alpha clipping" and is a cheap method to create hard transparency.
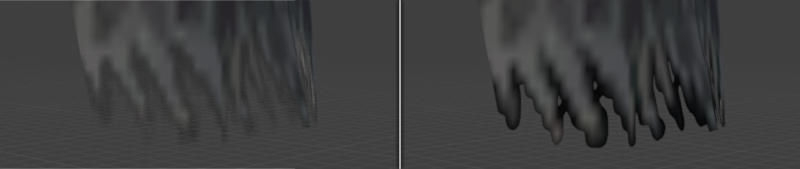
A reTHAWed-specific property that disables filtering on the material.
This property can be used to easily simulate "retro" or "pixelated" textures. Enabling the property will cause the renderer to use nearest-point sampling when rendering the texture.

Prevents the material from writing to the Z buffer when rendered.
This is a technical parameter for those familiar with the graphics pipeline. Realistically, this parameter should be used for materials where sloppy transparency is acceptable and where faces can safely render over each other, such as godrays or light beams.
Disables back-face culling for the material and makes it (as the name implies) double-sided.
An NXTools-specific property designed to aid in map creation.
Faces with a material marked as invisible will not be exported to the level's
A reTHAWed-specific property that enables THUGPro's water effect on the material.
This is a specific-use property that causes a ripple effect using a fake bumpmap.
Name Checksum
A secondary internal identifier for the material. Certain name checksums, especially on Create-a-Skater items, serve unique purposes.
For example, the
tshirt_shirt checksum causes the material to be affected by shirt color.Draw Order
Affects the draw order of the material.
Materials in the scene are generally sorted by their draw order, with the lowest values being rendered first. Prior to next-gen titles, the Neversoft engine has very enigmatic transparency.
A material's draw order becomes very important in ensuring proper partial transparency for glass, fencing, and more.
Z Bias
Affects the Z bias of the material.
In cases like decals or graffiti, faces on a mesh may be "on top of" other faces. Often times, these cases lead to behavior called Z fighting where the renderer fights to show both faces.
An easy fix to this problem is to apply a Z bias to the decal's material. This moves the material toward the camera slightly and aids in fixing Z fighting.
Override Terrain
An NXTools-specific property designed to aid in map creation.
With this property, any collision face with the material assigned will use its provided terrain type.
See the Collision page for more details about faces and terrain types.
Use Alpha Cutoff
Allows the material's alpha cutoff to be changed.
Any pixels with an alpha value lower than the material's defined alpha cutoff will not be rendered. This behavior is known as "alpha clipping" and is a cheap method to create hard transparency.
No Filtering
A reTHAWed-specific property that disables filtering on the material.
This property can be used to easily simulate "retro" or "pixelated" textures. Enabling the property will cause the renderer to use nearest-point sampling when rendering the texture.
No Z Write
Prevents the material from writing to the Z buffer when rendered.
This is a technical parameter for those familiar with the graphics pipeline. Realistically, this parameter should be used for materials where sloppy transparency is acceptable and where faces can safely render over each other, such as godrays or light beams.
Double Sided
Disables back-face culling for the material and makes it (as the name implies) double-sided.
Invisible
An NXTools-specific property designed to aid in map creation.
Faces with a material marked as invisible will not be exported to the level's
.scn scene.Water Effect
A reTHAWed-specific property that enables THUGPro's water effect on the material.
This is a specific-use property that causes a ripple effect using a fake bumpmap.
The Result
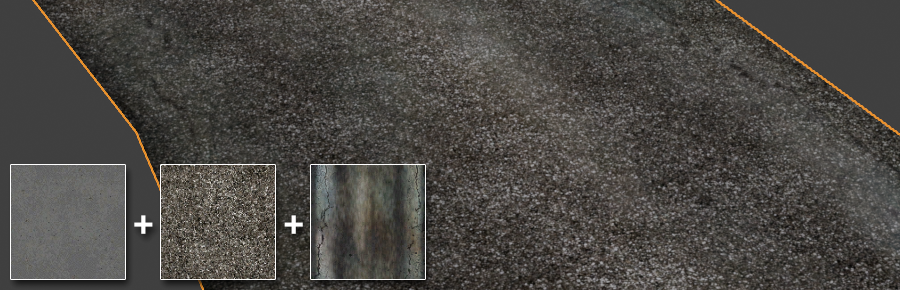
As mentioned previously, passes in a material can be thought of as layers in an image editor.
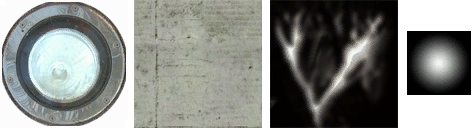
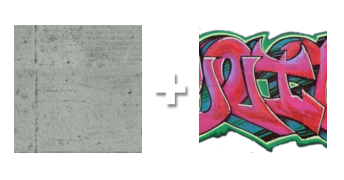
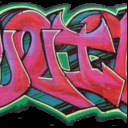
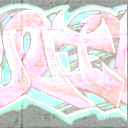
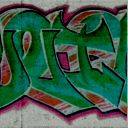
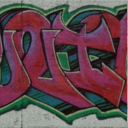
Let's visualize an example using these four textures:
Using the example above, you can see how alpha and blend modes control the layering of images.
Passes are added in sequence on top of each other.
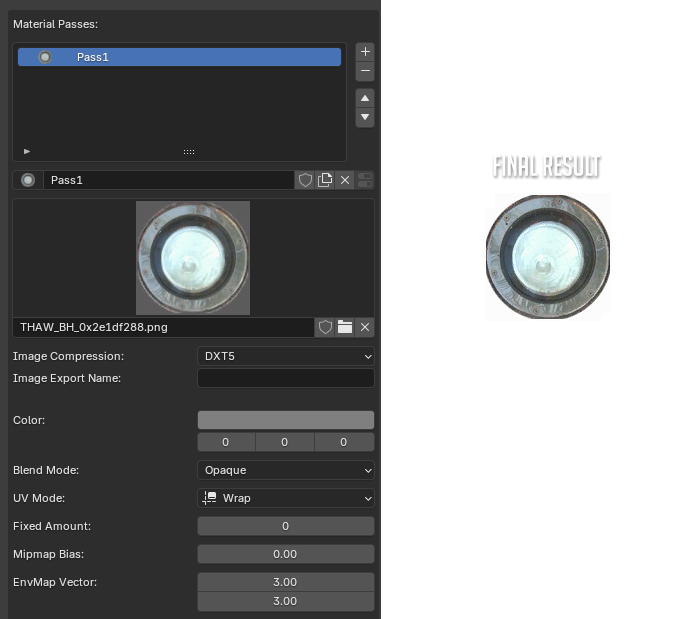
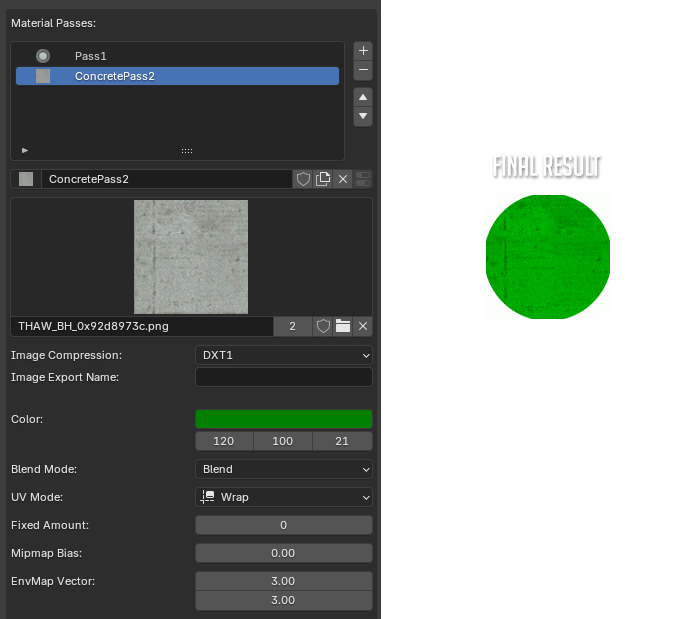
The final image always begins with the first pass.
The first pass is always used as the mask for the final image.
When a pass is applied, its blend mode determines how it appears on top of previous passes.
Let's visualize an example using these four textures:
We always begin with the first pass. This also determines the alpha for our final image.
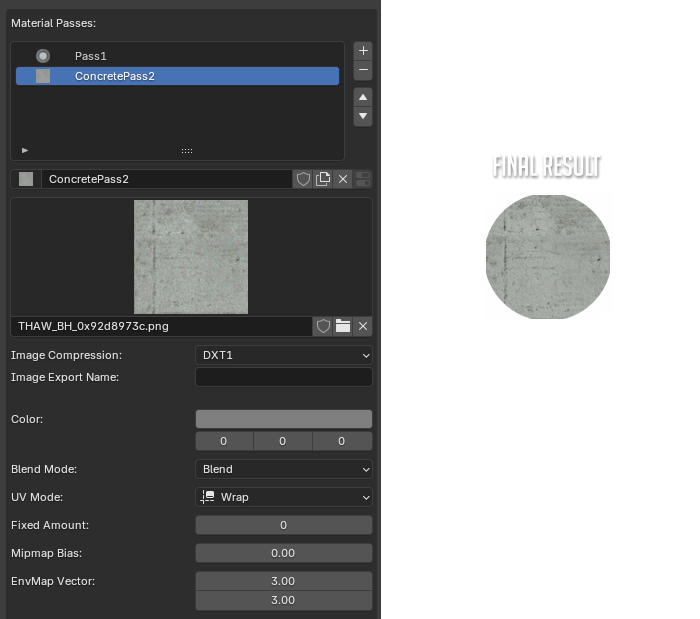
Let's add our second pass. Remember that the first pass determines the alpha of our final image.
If desired, we can use the Color property to tint the pass.
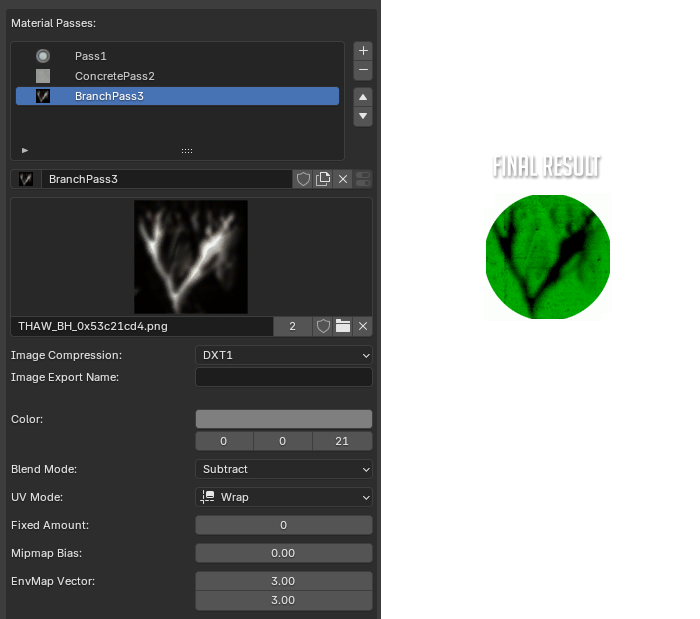
Let's add our third pass. This time, we'll use the Subtract blend mode.
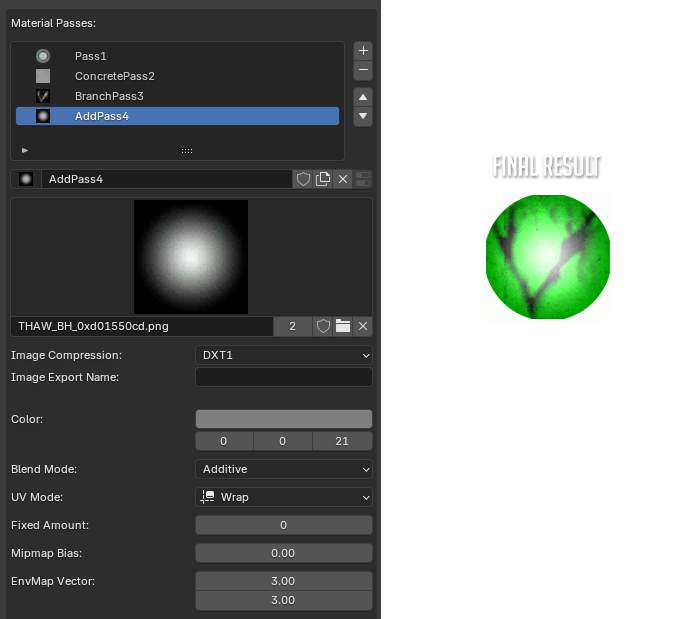
Finally, let's add a fourth pass using the Additive blend mode.
Using the example above, you can see how alpha and blend modes control the layering of images.
Blend Modes
Below are some of the most commonly used blend modes that can be applied to a pass.
Generally used for the first pass, or for passes with no transparency. This simply applies the pass on top and ignores all alpha information from the top image.
Simply applies the pass on top of all previous passes, keeping alpha information intact.

Mathematically adds the pixel values of the passes. Black pixels will do nothing, while white pixels will brighten the image.
Mathematically subtracts the pixel values of the passes. Black pixels will do nothing, while white pixels will darken the image.
Opaque
Generally used for the first pass, or for passes with no transparency. This simply applies the pass on top and ignores all alpha information from the top image.
Blend
Simply applies the pass on top of all previous passes, keeping alpha information intact.
Additive
Mathematically adds the pixel values of the passes. Black pixels will do nothing, while white pixels will brighten the image.
Subtract
Mathematically subtracts the pixel values of the passes. Black pixels will do nothing, while white pixels will darken the image.
Blend Modes - reTHAWed
The blend modes below have been added / restored specifically for use in reTHAWed.
Mathematically multiplies the pixel values of the passes. Black pixels make the image completely dark, while white pixels will do nothing. Colored pixels will tint the image. Great for lightmaps!
Cheap effect used to sloppily emulate detail maps from THPS2X. Pixels with a dark color will slightly darken the image, while pixels with a light color slightly brighten the image. Grey pixels do nothing.
Modulate
Mathematically multiplies the pixel values of the passes. Black pixels make the image completely dark, while white pixels will do nothing. Colored pixels will tint the image. Great for lightmaps!
Overlay
Cheap effect used to sloppily emulate detail maps from THPS2X. Pixels with a dark color will slightly darken the image, while pixels with a light color slightly brighten the image. Grey pixels do nothing.
UV Wibbles
Material passes can utilize a technique known as UV wibbling to shift or move their UV's.
For each material pass, the engine compiles a 2D UV offset for the X and Y axes.
The above values are added together to calculate the final UV offset.
NXTools exposes wibble properties once the UV Wibble checkbox is ticked.
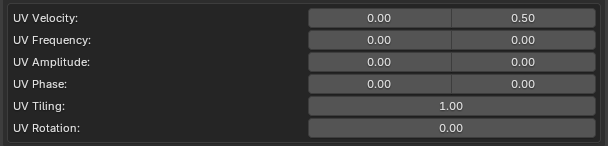
Controls a constant linear offset applied to UV's over time, making the texture steadily scroll in a direction.
This motion is independent of the oscillating wobble.
Determines how quickly the UV's oscillate over time.
Higher values produce faster, more rapid wobbling, while lower values result in slower movement.
Sets the strength or distance of the oscillation applied to the UVs.
Larger values create more pronounced distortion, while smaller values produce a subtler effect.
Offsets the starting point of the oscillation cycle.
This is useful for shifting or desynchronizing motion, especially between the U and V axes.
Controls how many times a texture repeats across a surface.
This property does not directly affect the wibble animation itself, but can influence how the distortion appears when applied to a tiled texture.
Rotates the UV coordinate space used for texturing.
This does not directly affect the wibble calculation, but can change the perceived direction of motion when combined with UV wibbling.
For each material pass, the engine compiles a 2D UV offset for the X and Y axes.
First, we compute oscillation for the pass:
sin(time * frequency + phase) * amplitude
Next, we compute the linear scroll for the pass:
time * velocity
The above values are added together to calculate the final UV offset.
NXTools exposes wibble properties once the UV Wibble checkbox is ticked.
UV Velocity
Controls a constant linear offset applied to UV's over time, making the texture steadily scroll in a direction.
This motion is independent of the oscillating wobble.
UV Frequency
Determines how quickly the UV's oscillate over time.
Higher values produce faster, more rapid wobbling, while lower values result in slower movement.
UV Amplitude
Sets the strength or distance of the oscillation applied to the UVs.
Larger values create more pronounced distortion, while smaller values produce a subtler effect.
UV Phase
Offsets the starting point of the oscillation cycle.
This is useful for shifting or desynchronizing motion, especially between the U and V axes.
UV Tiling
Controls how many times a texture repeats across a surface.
This property does not directly affect the wibble animation itself, but can influence how the distortion appears when applied to a tiled texture.
UV Rotation
Rotates the UV coordinate space used for texturing.
This does not directly affect the wibble calculation, but can change the perceived direction of motion when combined with UV wibbling.
Animated Textures
A material pass can use texture animation to cycle between various distinct images.
Animated textures can be thought of in a similar method to

Ticking the Animated Texture checkbox exposes more properties in NXTools:

Animation frames can be added using the
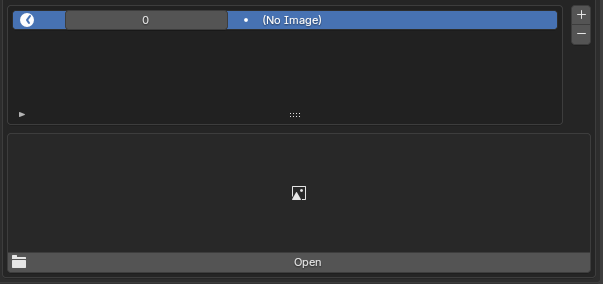
Browse for the needed image(s) to create the final animation.
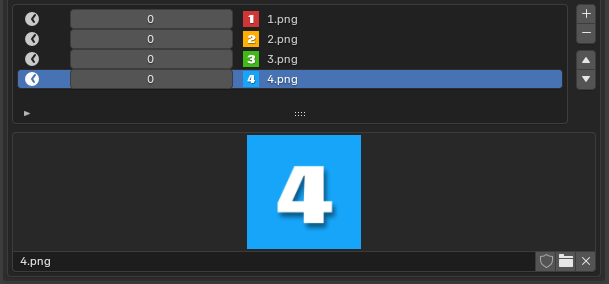
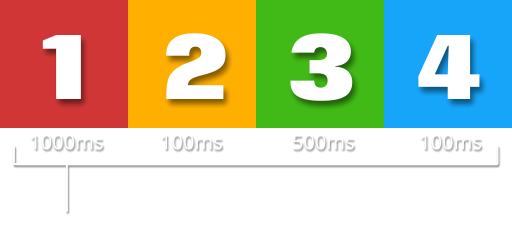
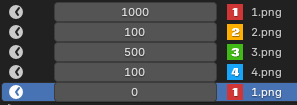
Beside each frame is its time value. Time is declared in milliseconds.

As a quirk of the Neversoft engine, the last frame must be a dummy image.
Animated textures can be thought of in a similar method to
.gif images. The final image is composed of multiple frames that play in sequence to display an animation. Each frame has a time value that affects the amount of time before the next frame is displayed.Ticking the Animated Texture checkbox exposes more properties in NXTools:
Animation frames can be added using the
Add Animation Frame button.Browse for the needed image(s) to create the final animation.
Beside each frame is its time value. Time is declared in milliseconds.
As a quirk of the Neversoft engine, the last frame must be a dummy image.
The last frame of the animation is essentially a placeholder frame.
Without it, the last image we would like to show (
4.png) will not appear in-game.UV Clipping
In certain situations, the 2D UV's of a pass may need to be clipped at the canvas edge. As mentioned above, we can modify the UV Mode of a pass to achieve this effect.
The examples below demonstrate clipping, with the UV bounds represented in white:
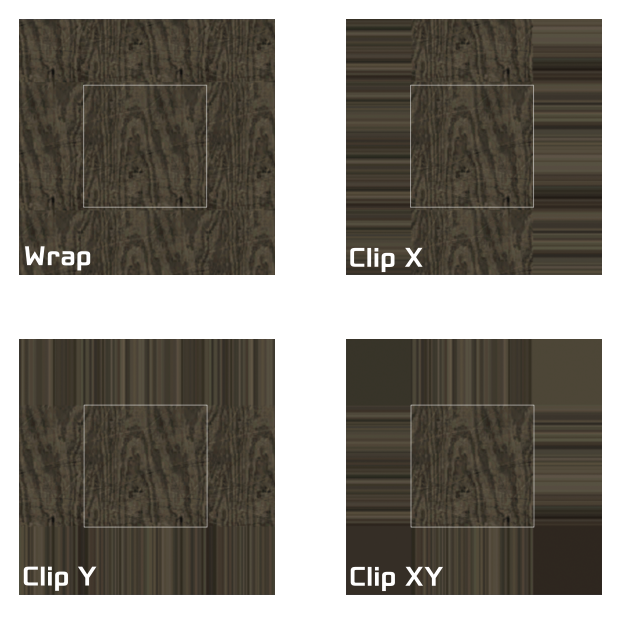
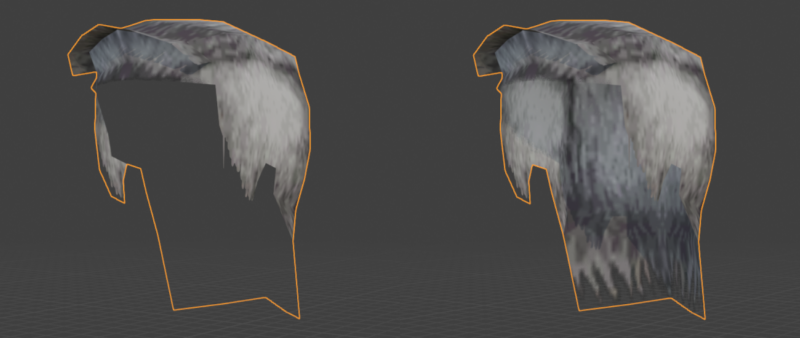
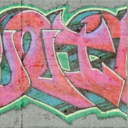
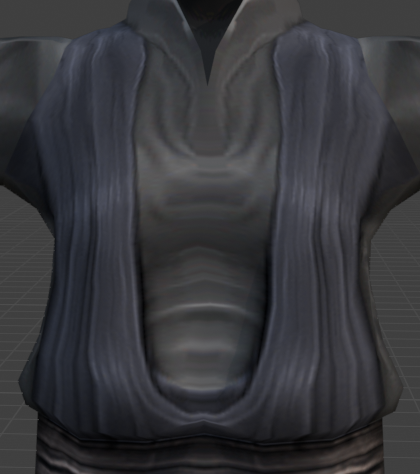
As an example, let's look at Darth Maul's robe:
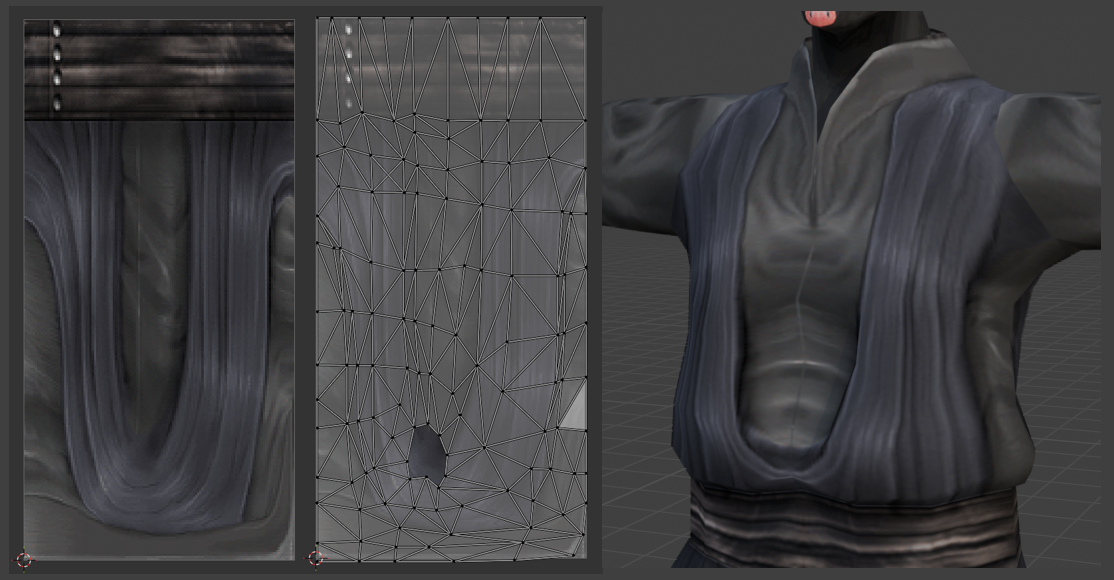

The examples below demonstrate clipping, with the UV bounds represented in white:
As an example, let's look at Darth Maul's robe:
Although the UV's do not explicitly cross the canvas border, they touch it.
Due to the proximity to the border, we can see the faint repetition from the other edge of the canvas.
Some scenarios, like mipmapping, will show this effect more severely.
In this particular case, we do NOT want the image to be tiled.
We can remedy this by setting the UV Mode to Clip X.
The image is now clipped on both sides of the X axis. Pixels at the canvas edge stretch infinitely.