Rails
About
In the THPS series, rails are an extremely important part of any level and a must-have for playability.
A rail is generally any narrow surface, such as a handrail, ledge, or fence, that the skater can use to grind between two points. Sometimes, a level's flow can even be enhanced further by adding rails onto structures like rope and wire to connect areas.
In reality, rails are simply a series of linked points that form a path.
Starting a grind will cause the skater to snap to the path and continue onto the next point(s) in sequence. Under the hood, a "rail" is closer to a spline or node-based path than a single piece of geometry.
However, a rail does not always have to be a multi-node path. Rails can also function as singular points.
In NXTools, we can add rails to our level using several methods.
Edge Rails
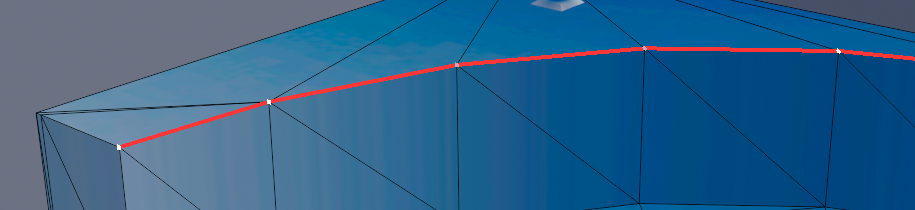
One of the easiest ways to add rails using NXTools is to define one or more edges as rails.
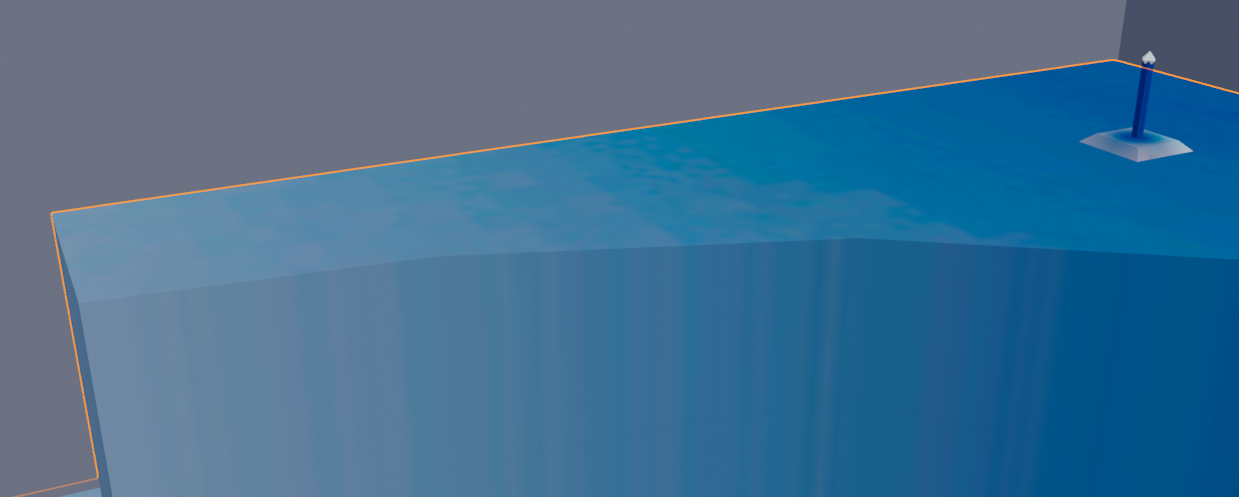
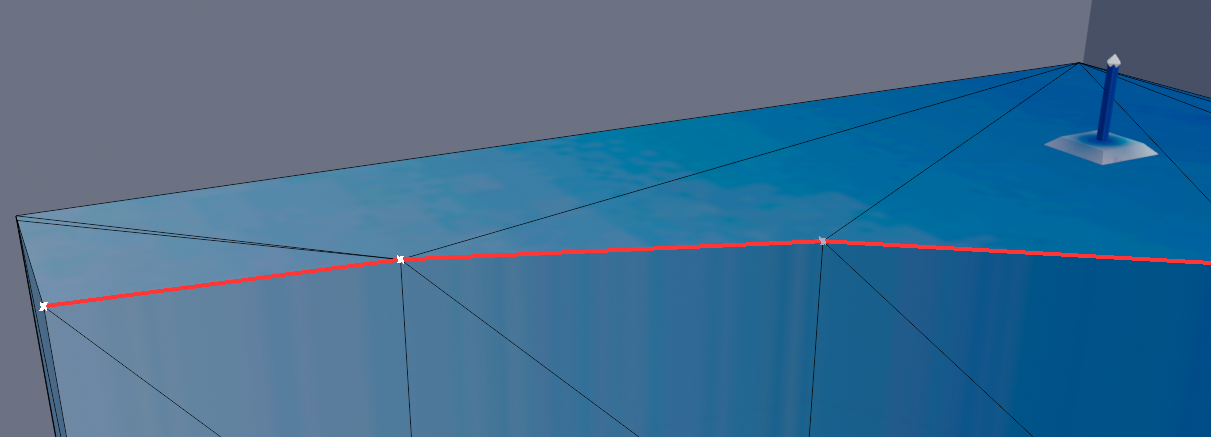
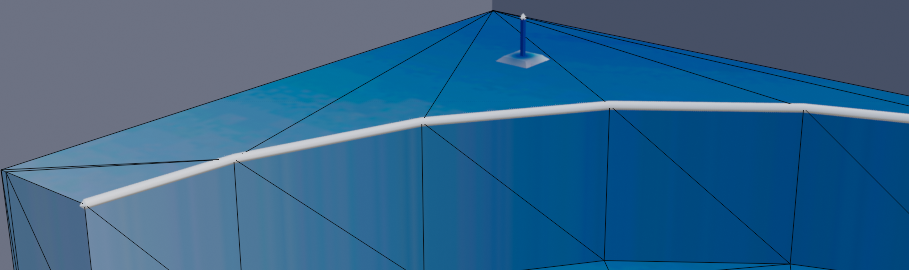
Grindable edges are marked in red, with rail points on selected edges marked as white crosses.
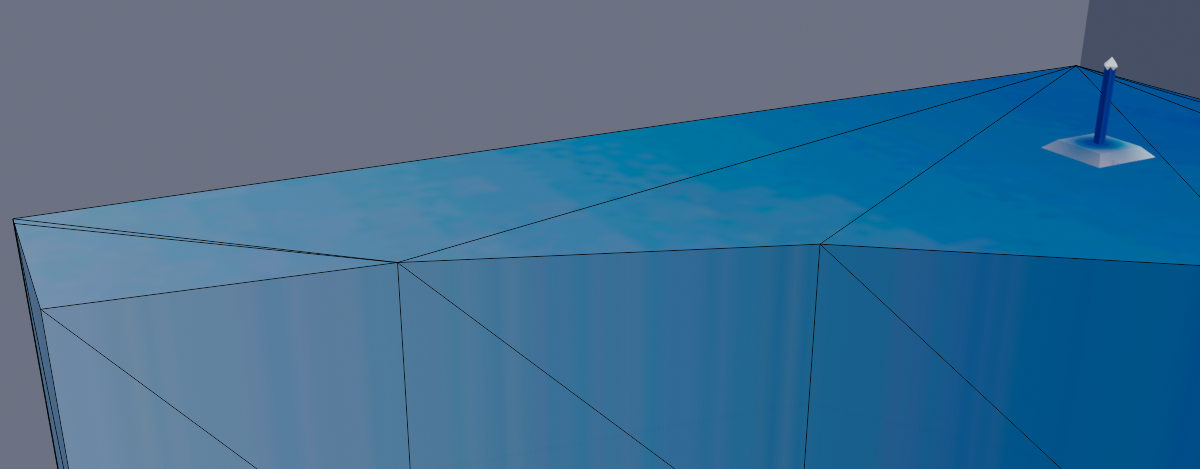
Select the object that needs new rail(s) assigned to it.
Press the
Tab button to enter Edit Mode.Press the
2 button to enter Edge Mode.Select an edge, or multiple edges, to mark as grindable rails.
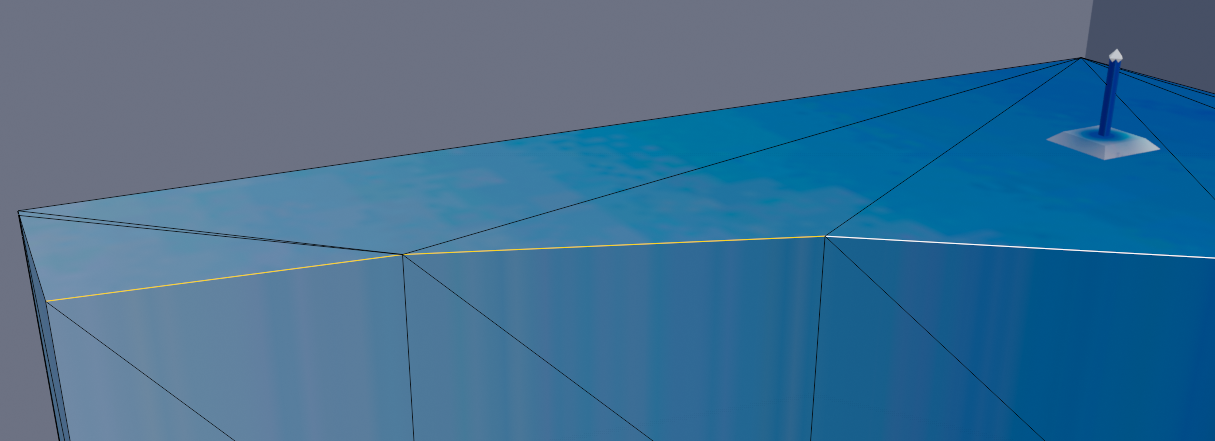
Press the
N button to open the Sidebar.Select the
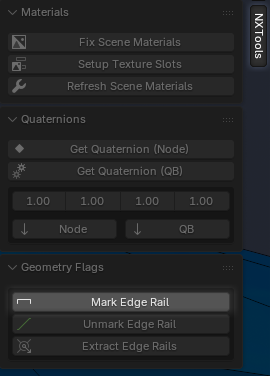
NXTools tab.With edge(s) selected, click the
Mark Edge Rail button.Grindable edges are marked in red, with rail points on selected edges marked as white crosses.
Standalone Rails
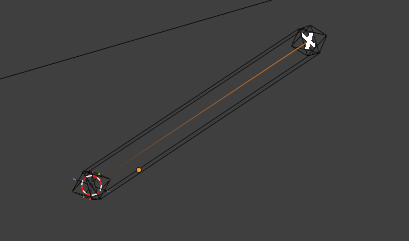
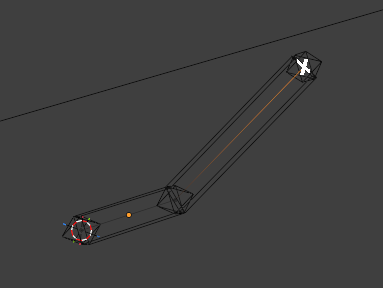
We can also create rails as standalone objects, rather than tying them to edges of a mesh. Standalone rail objects are invisible to the player (like collision) but still function as grindable rails.
Using standalone rails can be a useful tool in certain scenarios, especially when the path to grind does not match up neatly with the visual scene geometry. Rails created using this method will export rail nodes in the same way as the edge rail method above.

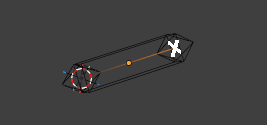
A rail object, when created, is simply an edge with a Geometry Node modifier. Its vertices can be moved freely, and actions can be applied onto its edge(s) like any other editable mesh.
Any vertex-based operation can be performed on the selected vertices.
Experiment with different methods to create working rail objects!
Using standalone rails can be a useful tool in certain scenarios, especially when the path to grind does not match up neatly with the visual scene geometry. Rails created using this method will export rail nodes in the same way as the edge rail method above.
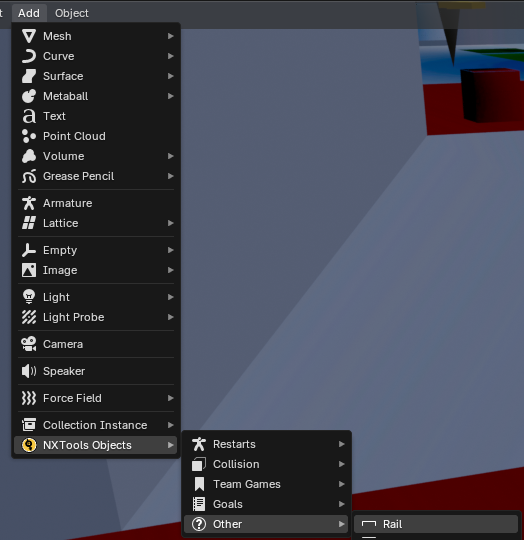
Add a rail with Add > NXTools Objects > Other > Rail
A rail object, when created, is simply an edge with a Geometry Node modifier. Its vertices can be moved freely, and actions can be applied onto its edge(s) like any other editable mesh.
With the rail selected, press
Tab to enter Edit Mode.Press the
1 key to enter vertex mode.For better visual clarity, press
Z and 4 to enter the wireframe view.Selected vertices will be displayed as a white cross in the 3D viewport.
Any vertex-based operation can be performed on the selected vertices.
Use the
G key to move the selected vertex.The selected vertex can be extruded using the
E key.Experiment with different methods to create working rail objects!
Extracting Rails
If desired, rails can be extracted from an edge-marked object into standalone rail objects.
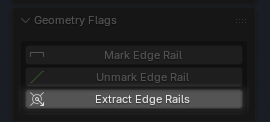
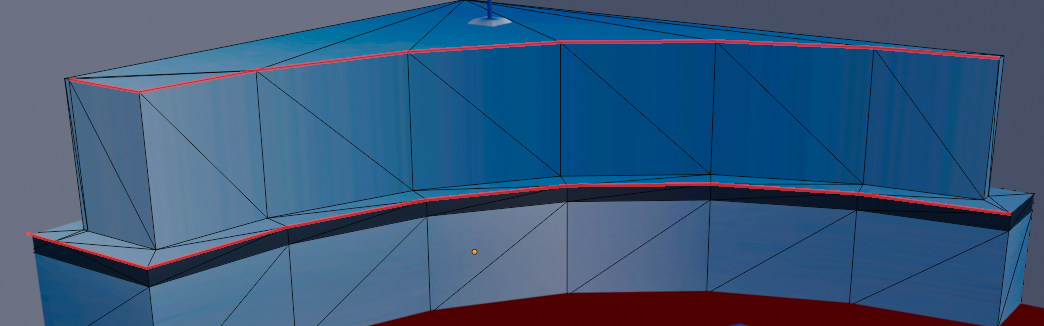
Edges on the object that are marked as rails will be extracted into standalone rail objects.
Ensure that the selected object has valid edge-marked rails.
Press the
Tab key to enter Edit Mode.Press the
2 key to enter edge mode.Press the
N key to open the sidebar.Select the
NXTools tab.Select the
Extract Edge Rails button to extract valid edge-marked rails.Edges on the object that are marked as rails will be extracted into standalone rail objects.
Point Terrain
Each point on a rail can have a terrain type associated with it. These terrain types can change certain aspects of the rail including particle effects, grind sound, and slide sound.
We can assign a terrain type to a rail point easily in NXTools.
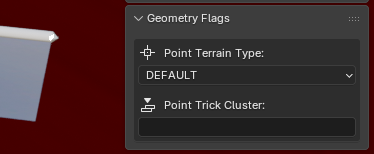
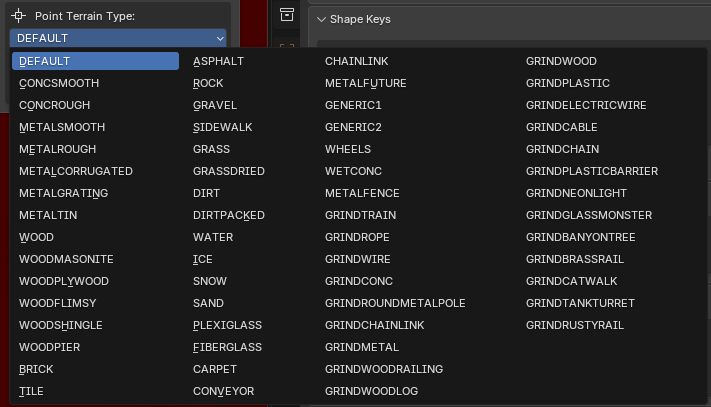
The terrain type of the vertex can be specified using the provided dropdown menu.
Notice that terrain type is defined per point and not per edge. As mentioned previously, rails are simply a series of connected points that make up a linked-node path.
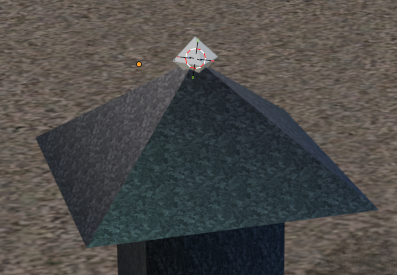
We can visualize these links using the
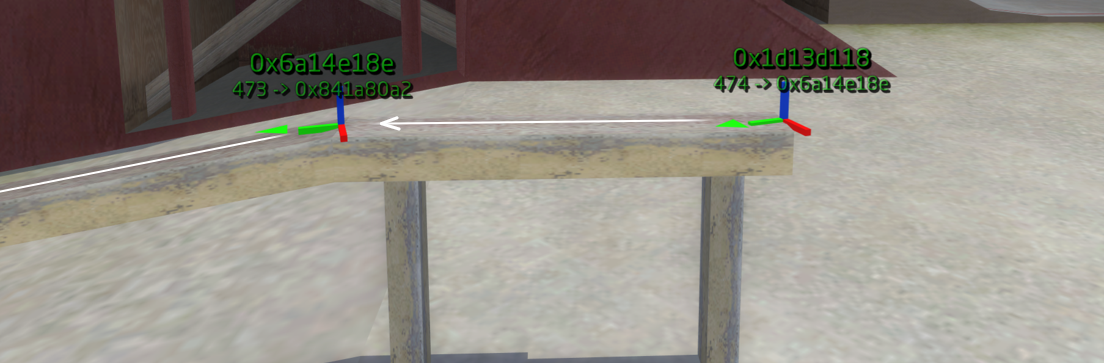
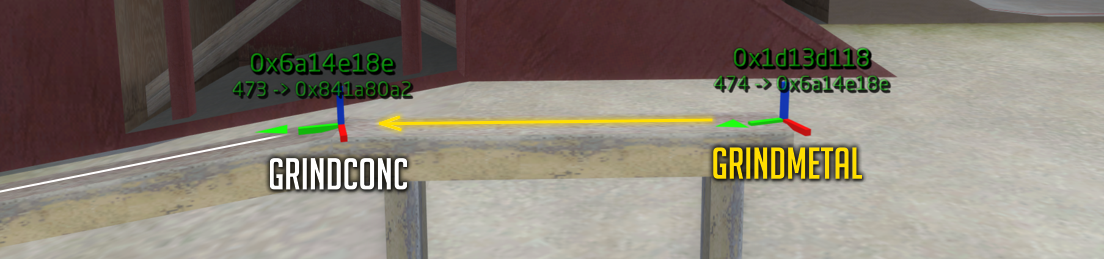
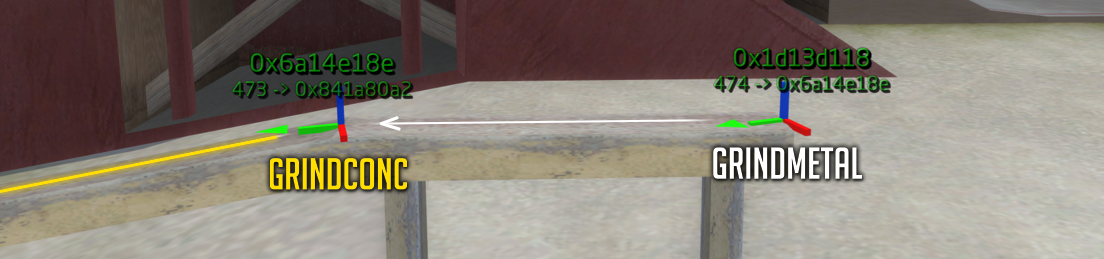
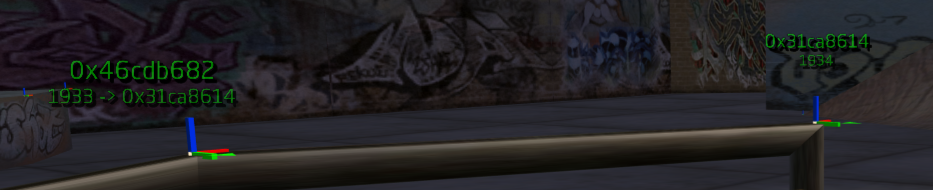
Let's assume, for example, that we've assigned terrain types to the two nodes pictured.
The direction of the rail (the order of the links) is visualized by the white arrows. We can see that node
Given any point on a rail, its terrain will extend onwards to its linked point.
In the example above, the
The
Knowing this, we can determine what the active terrain type will be for any spot on the rail.
We can assign a terrain type to a rail point easily in NXTools.
With a rail or edge-marked object selected, press the
Tab key to enter Edit Mode.Press the
1 key to enter vertex mode.Press the
N key to expose the sidebar.Select the
NXTools tab.Expand the
Geometry Flags panel.Selecting a vertex will expose various rail parameters in the panel.
The terrain type of the vertex can be specified using the provided dropdown menu.
Notice that terrain type is defined per point and not per edge. As mentioned previously, rails are simply a series of connected points that make up a linked-node path.
We can visualize these links using the
debugrails command, explained below in the Debugging Rails section.Let's assume, for example, that we've assigned terrain types to the two nodes pictured.
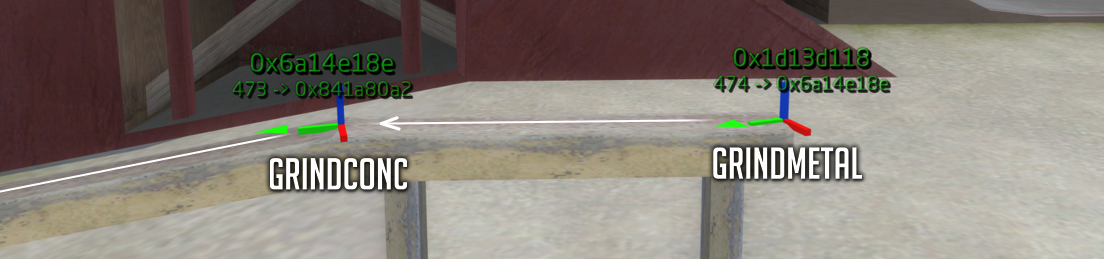
The direction of the rail (the order of the links) is visualized by the white arrows. We can see that node
474 on the right side of the image is linked to node 473 on the left.Node
474 has the GRINDMETAL terrain type.Node
473 has the GRINDCONC terrain type.Given any point on a rail, its terrain will extend onwards to its linked point.
In the example above, the
GRINDMETAL terrain extends from node 474 to node 473.The
GRINDCONC terrain will extend from node 473 to the next node in the path.Knowing this, we can determine what the active terrain type will be for any spot on the rail.
Trick Clusters
When editing a point on a rail, the
A "cluster" can essentially be thought of as a tag in the Graffiti gamemode. A single cluster can have multiple objects assigned to it, and will count as a tag if any of its objects are tricked on.
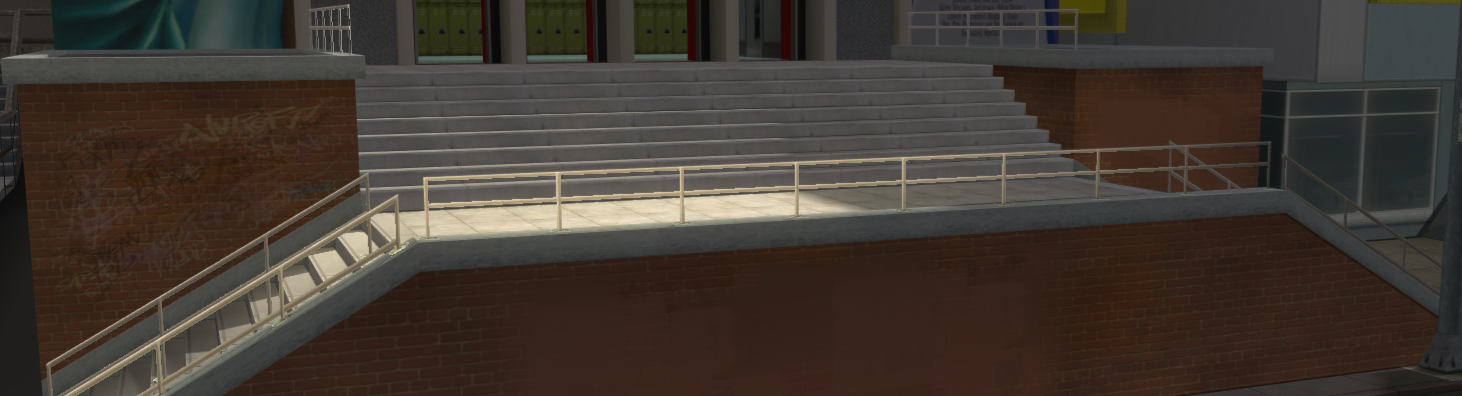
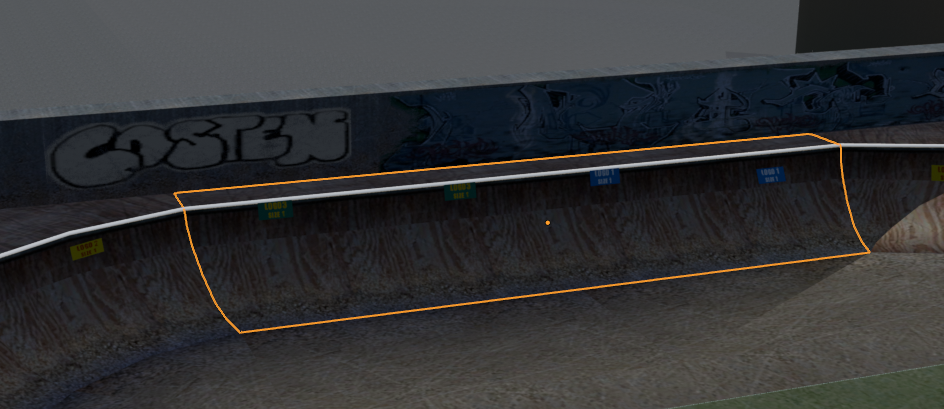
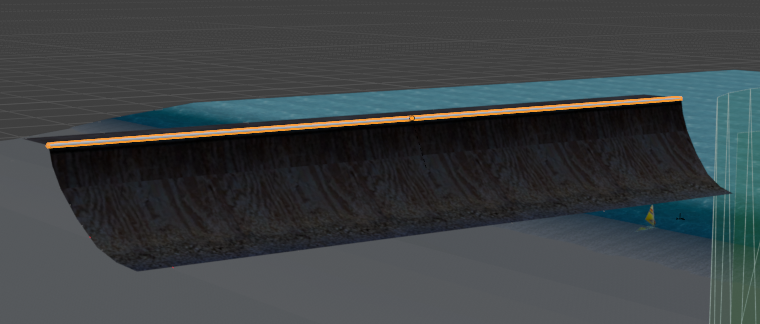
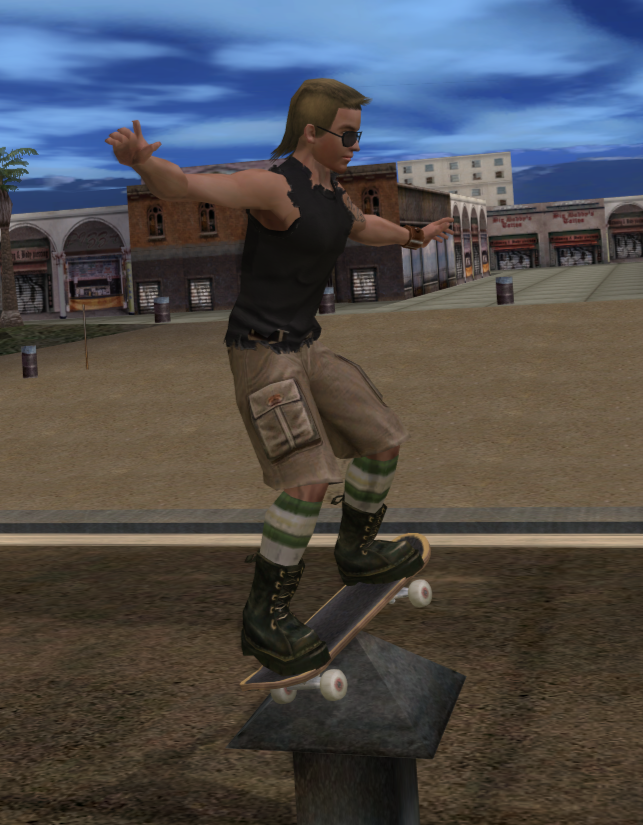
As a simple example, let's look at a vert ramp from Venice that has a grindable edge.
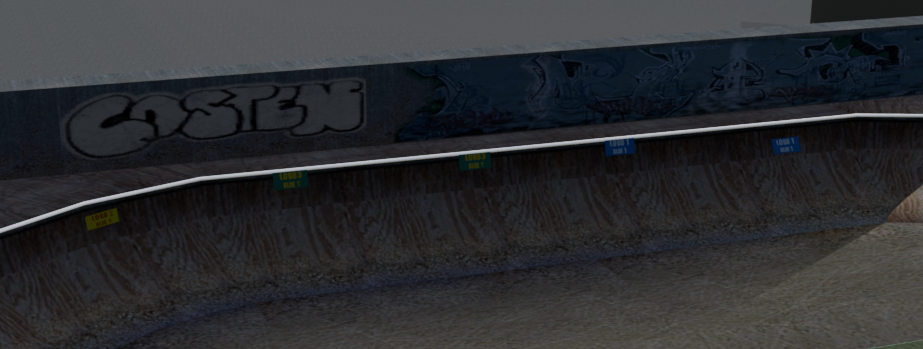
As pictured, we have a singular rail spanning across the entire ramp. However, the ramp itself is separated into multiple segments of geometry.
Each object can be assigned a cluster in its NXTools properties.

In the Graffiti gamemode, these objects would count as three separate tags.
However: Even though an object has a cluster assigned, the standalone rail above it knows nothing about it!
Like other objects, a rail can have its own cluster assigned to it via its properties.

By default, the rail's assigned cluster will apply to all of its points.
The rail in this example would use
In the example above, we need to account for the middle and right segments. By grinding across them using the rail above, we want to tag their clusters.
We can do so by overriding the cluster of the desired rail points using the
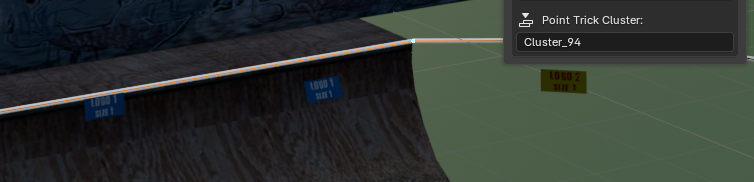
By assigning
Per-point cluster overriding can be useful in situations where a rail stretches across multiple objects.
Did you know? A rail with no cluster defined can inherit its parent's cluster if parented to an object.
In the example above, the vert ramp has the

The selected rail has no cluster assigned, but is parented to the vert ramp.

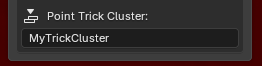
Since the rail has no cluster but is marked as a taggable Trick Object, the
Point Trick Cluster property is exposed in NXTools.A "cluster" can essentially be thought of as a tag in the Graffiti gamemode. A single cluster can have multiple objects assigned to it, and will count as a tag if any of its objects are tricked on.
As a simple example, let's look at a vert ramp from Venice that has a grindable edge.
As pictured, we have a singular rail spanning across the entire ramp. However, the ramp itself is separated into multiple segments of geometry.
Each object can be assigned a cluster in its NXTools properties.
In the Graffiti gamemode, these objects would count as three separate tags.
The left segment is assigned the
Cluster_92 cluster.The middle segment is assigned the
Cluster_93 cluster.The right segment is assigned the
Cluster_94 cluster.However: Even though an object has a cluster assigned, the standalone rail above it knows nothing about it!
Like other objects, a rail can have its own cluster assigned to it via its properties.
By default, the rail's assigned cluster will apply to all of its points.
The rail in this example would use
Cluster_92 on each of its points. Grinding the rail would tag the Cluster_92 cluster, and in this case, tag the left vert segment.In the example above, we need to account for the middle and right segments. By grinding across them using the rail above, we want to tag their clusters.
We can do so by overriding the cluster of the desired rail points using the
Point Trick Cluster property.By assigning
Cluster_94 to the point pictured above, we can override the rail's cluster. Grinding across this point will now tag the Cluster_94 cluster, placing a tag on the right segment.Per-point cluster overriding can be useful in situations where a rail stretches across multiple objects.
Cluster Inheritance
Did you know? A rail with no cluster defined can inherit its parent's cluster if parented to an object.
In the example above, the vert ramp has the
Cluster_93 cluster assigned.The selected rail has no cluster assigned, but is parented to the vert ramp.
Since the rail has no cluster but is marked as a taggable Trick Object, the
Cluster_93 cluster will be assigned from its parent object. This functions as an easy way to manage cluster relationships in NXTools.Point Rails
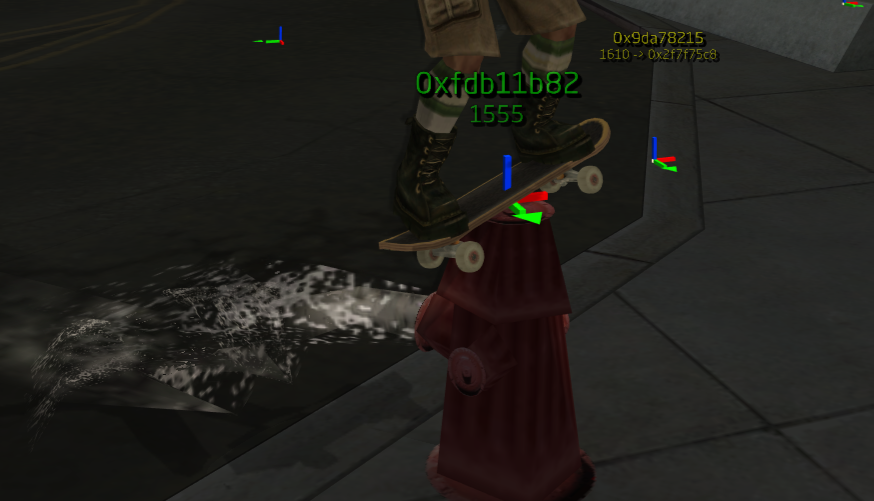
As mentioned above, a rail does not have to be a multi-point path. Single-point rails are also supported.
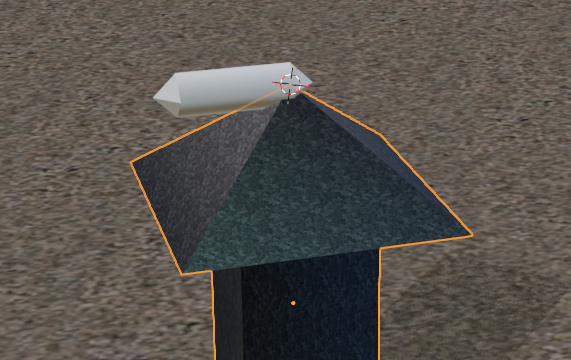
The best way to create a point rail is to start by creating a standalone rail object.
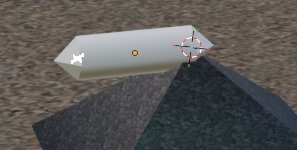
We can now trim the rail to a single point.
We are now left with a single-point rail object.
In-game, the point rail will function as a tap with normal grinds, but will also act as a functional Natas node.
The best way to create a point rail is to start by creating a standalone rail object.
We can now trim the rail to a single point.
Select the created rail object.
Press the
Tab key to enter Edit Mode.Press the
1 key to enter vertex mode.Select the vertex to be removed.
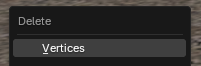
Press the
Delete key, and select Vertices.We are now left with a single-point rail object.
In-game, the point rail will function as a tap with normal grinds, but will also act as a functional Natas node.
Rail Angles
It should be noted that the skater will automatically leave a rail, given a sharp enough angle.
The skater can grind around a rail's corner, as long as its angle does not exceed
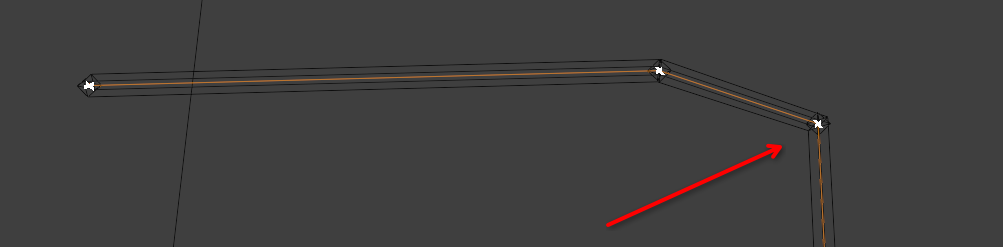
Depending on the geometry of an object, there may be cases where its edges form a sharp angle.
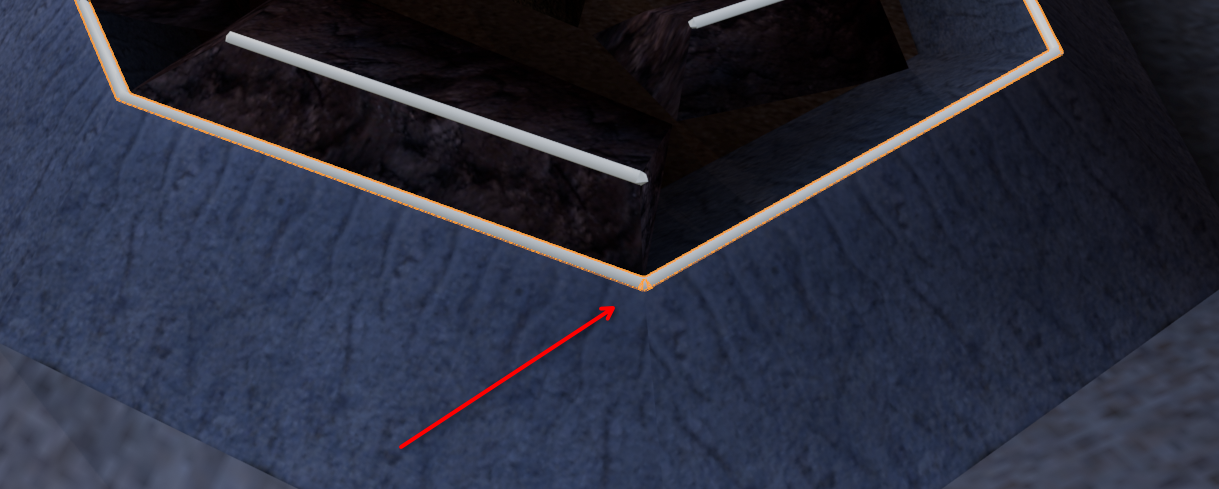
This can easily be fixed by adding a small bevel to the vertex.
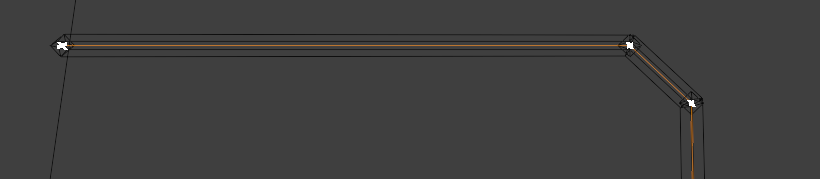
By moving the mouse slightly and left clicking, we can apply a bevel to the vertex.
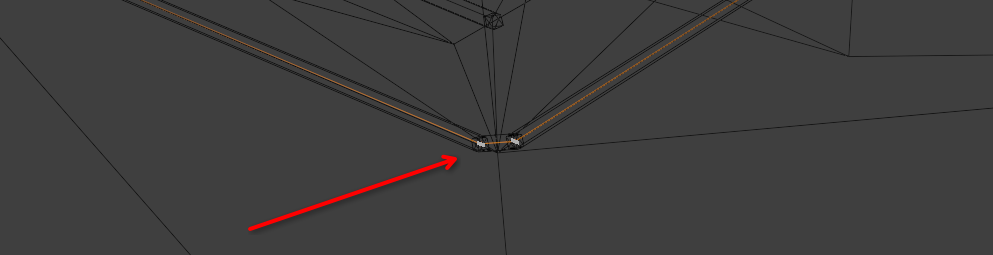
Beveling a vertex adds "helper vertices" and therefore reduces the sharpness of the corner's angle.
The skater can grind around a rail's corner, as long as its angle does not exceed
45 degrees.Depending on the geometry of an object, there may be cases where its edges form a sharp angle.
This can easily be fixed by adding a small bevel to the vertex.
With the rail selected, press the
Tab key to enter edit mode.Press the
1 key to enter vertex mode.Select the vertex to be beveled.
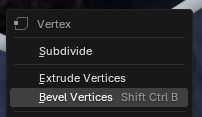
Right-click and select the
Bevel Vertices option.By moving the mouse slightly and left clicking, we can apply a bevel to the vertex.
Beveling a vertex adds "helper vertices" and therefore reduces the sharpness of the corner's angle.
Debugging Rails
Inevitably, situations will arise where we need to debug or visualize rails and rail nodes in-game.
reTHAWed offers an interactive rail debugger using the

Alternatively, we can use the


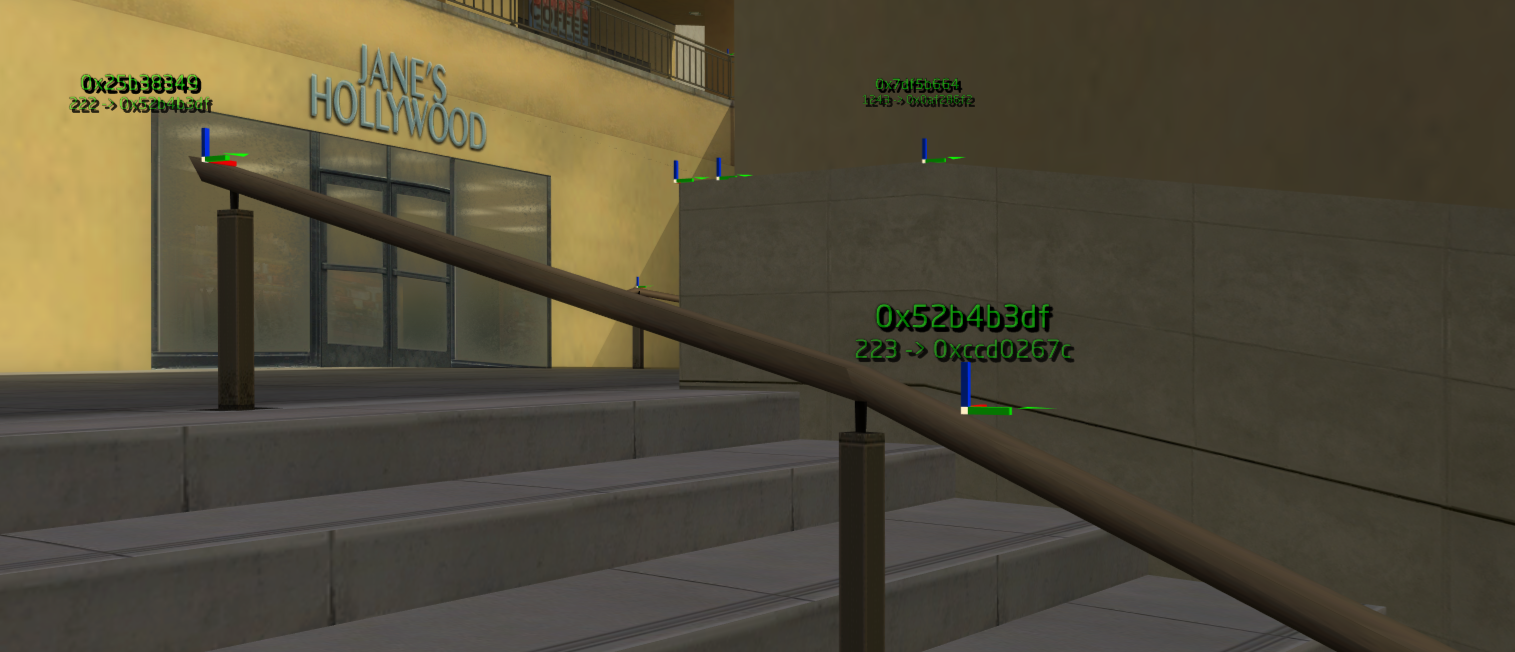
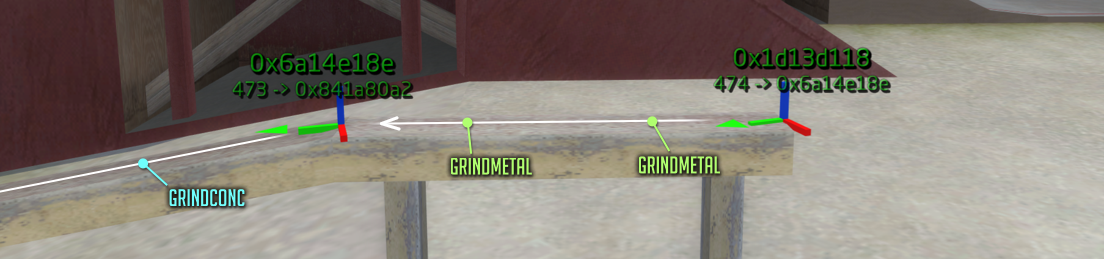
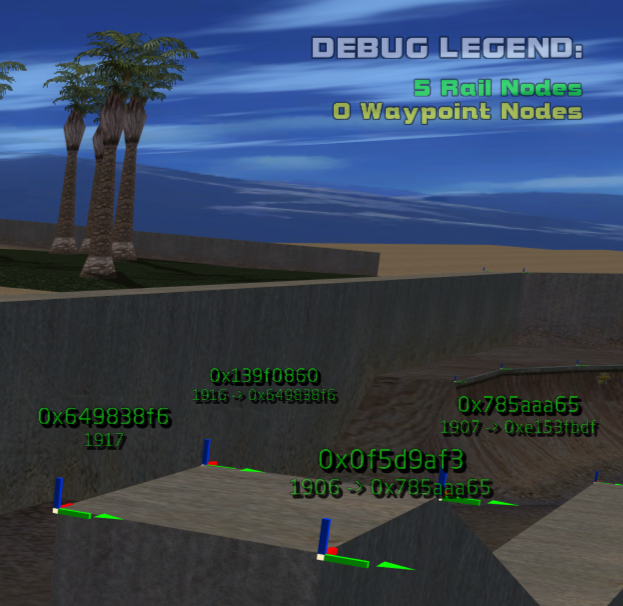
Individual rail nodes will now appear as small gizmos in the world space.
Each node displays the following info:
The debug legend will also show the number of visible rail nodes in proximity to the player.
reTHAWed offers an interactive rail debugger using the
debugrails console command.Enable
Modder Mode in Options > DisplayOpen the console using the
~ key.Type
debugrails and press the Enter key.Alternatively, we can use the
Debug Rails/Waypoints button in the Modder Toolbox menu.Individual rail nodes will now appear as small gizmos in the world space.
Each node displays the following info:
The node's
id variable (its name), indicated by the top checksumThe index of the node in the level's NodeArray
The
id variable of the next node in sequence, if the visualized node has a valid linkThe debug legend will also show the number of visible rail nodes in proximity to the player.